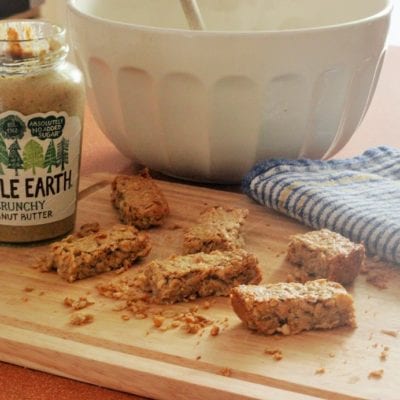
For Filling, Dipping and Devouring…
I fell in love with my ever-changing and exciting homemade flat breads over a year ago when I decided to bid farewell to yeast and the traditional sarnie in a bid to improve my digestion. And boy did it work! Not only do I rarely experience IBS (yep, that ole chestnut; Irritable Bowel Syndrome), but my lunchtimes are also so much more fun. All my life I’d been a traditional British Cheddar cheese sandwich for lunch kind of girl. Y’know, they’re just quick to make, we get set in our ways and never really question why we don’t give anything else a whirl. As much as I am a foodie, there was a BIG part of me stuck in my West Country Comfort Zone when it came to getting creative in the kitchen between noon and 2:00pm… unless of course we’re talking cake!
But happily, that kind of limited thinking is all in the past and I present to you my delicious Recipe: Four Fabulous Flat Breads.
Rosemary Flat Bread

I make this one ALL of the time. Why? Well, it’s simple, quick to knock up and, just as rosemary can be used to jazz up so many different international savoury dishes, when added to flat bread it pairs itself amazingly with a whole host of fillers – tuna, Italian cheeses, Mexican salsas, pulled pork, roast chicken or a simple hummus, to name a few!
So here’s how to make it…
Ingredients:
360g plain white flour (if you can get your hands on a strong plain white flour, even better!)
2 teaspoons dried rosemary… but if you grow it fresh in your garden like me then chop up 2 teaspoons worth of that as it will taste incredible!
1 generous pinch of salt (good quality only – Pink Himalayan or sea salt… definitely no table salt!)
2 tablespoons olive oil
220ml warm water
Method:
1) Coat the inside of a large bowl with a little oil.
2) Now tip the flour, salt and rosemary into a separate large bowl and mix together. You can sieve the flour but I can honestly say you are giving yourself an extra job for nothing if you do. Having tried this both ways, taking the short cut of not sieving makes no difference to the dough’s elasticity or taste. So give yourself less work, why don’t you…?
3) Make a well in the middle of the dry mix and then tip in the warm water and oil.
4) Mix together to make a dough.
5) Lightly flour a work surface and take your ball of dough then give it a quick kneading for around 5 minutes.
6) Now place it in the oiled bowl and cover with cling film. Leave it to ‘do its thing’ for around half an hour. It won’t look any larger when you go back to it but it will improve it’s texture and become easier to stretch and roll out.
7) Divide the dough roughly into 8 pieces and then roll them into circular shapes so that they easily rest into the frying pan of your choice ready for the next step. Don’t worry about overlapping, just tuck any excess dough over when you pop it into the frying pan. Were talking rustic baking here!
8) Lightly oil said frying pan and cook the discs over a medium heat for around 2 minutes per side, or until golden brown. If you are going to add a filling make sure your filling is cooked through first if it needs to be and add it after you have cooked the bread for 2 minutes on just one side. Once you have added your filling, carefully fold the excess flat bread around it and gently turn it with a fish slice so you achieve an all-over browning.
9) Serve warm from the pan and enjoy.
Chili Flat Bread

What dish doesn’t go well with this? As perfect as a side car is to a motorbike; eat it with curry, couscous, chickpeas, rice and Sicilian inspired pasta dishes.
Ingredients:
360g plain white flour (if you can get your hands on a strong plain white flour, even better!)
1 generous pinch of salt (good quality only – Pink Himalayan or sea salt… definitely no table salt!)
2 tablespoons chili infused olive oil
220ml warm water
Method:
1) Coat the inside of a large bowl with a little oil.
2) Now tip the flour and salt into a separate large bowl and mix together. You can sieve the flour but I can honestly say you are giving yourself an extra job for nothing if you do. Having tried this both ways, taking the short cut of not sieving makes no difference to the dough’s elasticity or taste. So give yourself less work, why don’t you…?
3) Make a well in the middle of the dry mix and then tip in the warm water and chili oil.
4) Mix together to make a dough.
5) Lightly flour a work surface and take your ball of dough then give it a quick kneading for around 5 minutes.
6) Now place it in the oiled bowl and cover with cling film. Leave it to ‘do its thing’ for around half an hour. It won’t look any larger when you go back to it but it will improve it’s texture and become easier to stretch and roll out.
7) Divide the dough roughly into 8 pieces and then roll them into circular shapes so that they easily rest into the frying pan of your choice ready for the next step. Don’t worry about overlapping, just tuck any excess dough over when you pop it into the frying pan. Were talking rustic baking here!
8) Lightly oil said frying pan and cook the discs over a medium heat for around 2 minutes per side, or until golden brown. If you are going to add a filling make sure your filling is cooked through first if it needs to be and add it after you have cooked the bread for 2 minutes on just one side. Once you have added your filling, carefully fold the excess flat bread around it and gently turn it with a fish slice so you achieve an all-over browning.
9) Serve warm from the pan and enjoy.
Lemon Flat Bread

A little unorthodox maybe… But have you tried this delicious and zesty bread wrapped around salmon and cream cheese? Or chili-infused sardines in a tomato sauce? This recipe is so versatile you can even turn it into a flat bread inspired pancake by adding a couple of handfuls of raisins in with the dough and sprinkling lightly with sugar after frying… The possibilities are as endless as your imagination (plus a little common sense as to what actually ‘goes’ with the taste of lemon!)
Ingredients:
360g plain white flour (if you can get your hands on a strong plain white flour, even better!)
zest of half a large lemon
1 generous pinch of salt (good quality only – Pink Himalayan or sea salt… definitely no table salt!)
2 tablespoons olive oil
220ml warm water
Method:
1) Coat the inside of a large bowl with a little oil.
2) Now tip the flour, salt and lemon zest into a separate large bowl and mix together. You can sieve the flour but I can honestly say you are giving yourself an extra job for nothing if you do. Having tried this both ways, taking the short cut of not sieving makes no difference to the dough’s elasticity or taste. So give yourself less work, why don’t you…?
3) Make a well in the middle of the dry mix and then tip in the warm water and oil.
4) Mix together to make a dough.
5) Lightly flour a work surface and take your ball of dough then give it a quick kneading for around 5 minutes.
6) Now place it in the oiled bowl and cover with cling film. Leave it to ‘do its thing’ for around half an hour. It won’t look any larger when you go back to it but it will improve it’s texture and become easier to stretch and roll out.
7) Divide the dough roughly into 8 pieces and then roll them into circular shapes so that they easily rest into the frying pan of your choice ready for the next step. Don’t worry about overlapping, just tuck any excess dough over when you pop it into the frying pan. Were talking rustic baking here!
8) Lightly oil said frying pan and cook the discs over a medium heat for around 2 minutes per side, or until golden brown. If you are going to add a filling make sure your filling is cooked through first if it needs to be and add it after you have cooked the bread for 2 minutes on just one side. Once you have added your filling, carefully fold the excess flat bread around it and gently turn it with a fish slice so you achieve an all-over browning.
9) Serve warm from the pan and enjoy.
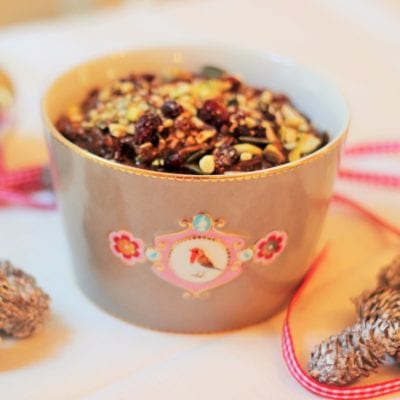
Cranberry Flat Bread

This makes the perfect Christmassy treat when filled with a hunk of Brie… and a generous dollop of cranberry sauce on the side for dipping.
Ingredients:
360g plain white flour (if you can get your hands on a strong plain white flour, even better!)
2 tablespoons dried cranberries
1 generous pinch of salt (good quality only – Pink Himalayan or sea salt… definitely no table salt!)
2 tablespoons olive oil
220ml warm water
Method:
1) Coat the inside of a large bowl with a little oil.
2) Now tip the flour, salt and dried cranberries into a separate large bowl and mix together. You can sieve the flour but I can honestly say you are giving yourself an extra job for nothing if you do. Having tried this both ways, taking the short cut of not sieving makes no difference to the dough’s elasticity or taste. So give yourself less work, why don’t you…?
3) Make a well in the middle of the dry mix and then tip in the warm water and oil.
4) Mix together to make a dough.
5) Lightly flour a work surface and take your ball of dough then give it a quick kneading for around 5 minutes.
6) Now place it in the oiled bowl and cover with cling film. Leave it to ‘do its thing’ for around half an hour. It won’t look any larger when you go back to it but it will improve it’s texture and become easier to stretch and roll out.
7) Divide the dough roughly into 8 pieces and then roll them into circular shapes so that they easily rest into the frying pan of your choice ready for the next step. Don’t worry about overlapping, just tuck any excess dough over when you pop it into the frying pan. Were talking rustic baking here!
8) Lightly oil said frying pan and cook the discs over a medium heat for around 2 minutes per side, or until golden brown. If you are going to add a filling make sure your filling is cooked through first if it needs to be and add it after you have cooked the bread for 2 minutes on just one side. Once you have added your filling, carefully fold the excess flat bread around it and gently turn it with a fish slice so you achieve an all-over browning.
9) Serve warm from the pan and enjoy.